Sweeter than Serenity: February 2015

Friday, February 27, 2015

NYC Cosmetic Review

When I first got asked to review a new eyeliner and mascara from New York Color, I was a little nervous, because with blue eyes, sometimes it's hard to wear dark eye make-up and not look a little bit scary. However, I am so glad that I had the opportunity to try out this make-up, because honestly, it is incredible. The picture on the left is no eye make-up, and the picture on the right is with NYC Big Bold Liquid Liner and NYC Big Bold Angel Lash Mascara


It's hard to believe how big of a difference it makes in making my eyes pop! Here's a little run-down on the specifics of these products:


The eyeliner is felt-tip, making the application incredibly easy, yet it still has the look of liquid eyeliner. The best part is that you can find this eyeliner in the store for about $3.00!


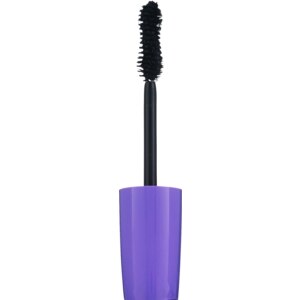
This mascara may possible contain the best mascara brush I have ever used. I have one particular mascara brush that I keep even when I try out other mascaras because it was the only one I could find that would keep my mascara from clumping up, but this brush works even better, so I am very pleased with it! This product is also very affordable, coming in at just $5.00!

Overall, I would rate these products very high in all categories, and they are definitely worth a try the next time you are looking for a good eyeliner and mascara!

Thank you so much for reading! Don't forget to follow along on Bloglovin and Instagram! Have a wonderful Friday!

God Bless, 
Hannah


These products were provided complimentary for testing. All opinions are my own.

Wednesday, February 25, 2015

February Giveaway!

I am so excited to announce that I have teamed up with some wonderful ladies to bring you a wonderful GIVEAWAY including $300 Paypal cash, a J.Crew Infinity Scarf, J.Crew Gloves, and a Romantic Moments Coffee Variety Package! You can enter in the Rafflecopter below, and don't forget to check out the other blogs listed below!


Your Hosts description here Afternoon Espresso
description here Eat Pray Wear Love description here Jenna Leeann description here Mommy in Heels description here Five Star Coffee
description here Daily Style Finds description here Red Reticule description here Ask Away description here Regally Soled
description here Still Being Molly description here Yes, Wear that! description here A Lily Love Affair description here Dressed up Deniz
description here Good Girl Gone Glam description here Sweeter than Serenity description here Keri Lynne description here Alex Butler TV
description here Fashion, Bling, and Other Girly Things


a Rafflecopter giveaway


God Bless!
Hannah

Tuesday, February 24, 2015

How To: Dutch Side Braid


I've gotten so many questions about how to do this dutch side braid that I decided to make a tutorial on it for you all! If you have anymore questions, feel free to ask!


This is what my hair looked like before I started.


To help my hair have more volume, I use Tresemme Dry Shampoo. I also use Tresemme Heat Tamer Spray before I use any heat products on my hair.


Before I start the braid, I straighten the top layer of my hair. It just allows for extra smoothness of the braid.


I also use Chi Silk Infusion after I straighten my hair to help with smoothness. If you have never tried this product before, it works wonders on both straight hair and curls.


I also like to give my hair a little bit of teasing before I start the braid. I have very fine hair, so I always add a little bit of tease to my hair. I keep it in place with Aussie Mega Hairspray.


You can see in this picture how the layers underneath are not straightened.


Once you get your hair smoothed out, pull it to the side, and make a part just behind the ear so that you have a front section (very small), and a back section.


Once you have made your sections, take a small piece of hair at the top that is between the two parts. You will start the braid here.


In order to make the dutch braid, you will weave your hair under instead of over, adding sections each time just as with a normal french braid.


Continue the braid down the side, staying behind the ear with it and keeping it tight.


Your braid will be very tight at this point. Continue braiding all the way down and tie it off at the bottom.


This is what your braid should look like at this point.


From the back, you can see how far back it is.


Now you can start pulling apart each section of the braid. Loosening it up adds volume to the braid and makes it appear thicker.


Continue to loosen up the braid all the way up until you have it as loose as you desire.


I like my braid to be very loose, so I make sure to stretch each piece individually as much as I can and still keep the braid together.


If you have any questions, feel free to ask! I hope this helps you with your next side dutch braid!

Thanks so much for reading! Don't forget to follow along on Bloglovin and Instagram!

God Bless!

Monday, February 23, 2015

Patterned


Forever 21 Sweater (old) (similar) // American Eagle Jeggings

This weekend was another gloomy weather weekend. I took advantage of the one hour of sunshine and got a few shots in from my Saturday outfit, but these pictures were so hard to get because I kept sinking into the ground! To top that off, we got more snow last night. I'm not sure whether I live in the north now or if I'm actually still in Arkansas! 

I hope you all had a wonderful weekend! Check back tomorrow to see a new hair tutorial! Thanks so much for reading, and don't forget to follow along on Bloglovin and Instagram!

God Bless!

Wednesday, February 18, 2015

IG Round-Up


Chris did so good taking me out to a wonderful Italian restaurant on Saturday night! He called ahead before we left and everything, but unfortunately a one hour wait turned into a two hour wait, so he got my favorite snack for me and delivered it with a rose!


Lucky for us, Saturday was a 70 degree day despite the fact that we have ice and snow currently. He took advantage of the day and went hiking/climbing, and I totally rocked my heart bow!


Have you tried out the BEARPAW Travel Boot (c/o) yet? It is SO comfortable, and a little bit more stylish than the simple ugg style boots. I love mine!


This frappucino that I discovered is like heaven on earth. Cookies-n-cream frappucino, friends. It doesn't get much better than this!


We finally got snow, so I finally got to wear my BEARPAW Ophelia (c/o) Snow Boots! They are incredibly warm, and I just can't over the gorgeous design on them!


I hope you are having a wonderful hump day and staying warm! We got some more snow last night, and we have more ice in the forecast for Friday, so it's pretty much staying winter weather central around here for the week! Don't forget to follow along on Bloglovin and Instagram! Also, I am part of a $500 Shopbop GIVEAWAY on Instagram currently, so make sure you stop by and enter it!

God Bless!
Hannah